Cek tutorial sebelumnya Tutorial Membuat Corridor
Untuk membuat cross section, pertama kita membuat sample lines atau garis pemotong untuk membuat cross section.
1. Klik Home – Sample lines – Pilih Alignment / center line – OK!

2. Pada tampilan create sample line group ubah Style seperti gambar dibawah – OK!

3. Pada simple line tools – pilih by range of station.
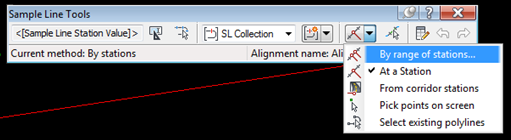
4. Isi Parameter sesuai yang diinginkan – OK! – Enter.

5. Sample lines telah dibuat.

Kedua kita akan membuat tampilan Cross Section.
1. Pilih Home – Section Views – Create Multipe Views – Create Section Views.

2. Pilih posisi akan diletakkannya Cross Section.

Berikut Tutorial membuat cross section dengan AutoCAD 3D Civil.
Next tutorial untuk menghitung volume material Cut & Fill Klik Tutorial Menghitung Volume
KENAPA SAYA GABISA BUAT SECTION VIEW PADAHAL UDAH NGIKUTIN CARANYA
BalasHapus